

I am a big fan of cheap crafts. Like, really cheap crafts. I often frequent Dollar Store Crafts for inspiration and ideas. So when I came across the idea of super cheap photo ornaments, I was super excited. I used this tutorial as a jumping off point, but didn't exactly follow it, more like I created my own method.
Here are the supplies you'll need, most of which you probably have on hand if you really are a crafter:
- Scissors
- Hot Glue Gun
- Ribbon (2" grosgrain & a thin satin)
- Pictures
- Clear-top tins from the Dollar Tree
 First step, cut out your pictures. I used Photoshop to add the names and dates to mine and printed them in circles. If you don't have Photoshop or any other editing software, simply trace the tin onto the picture and cut it out.
 The tins are pretty flimsy so handle with care. The clear plastic in the lids doesn't stay in good, so pop it back in if it has fallen out. You may need to use your nails to get it to pop in, there is a small rim you need to get past to make it sit flat.
 After that, put your picture in, face down.
 Ta-dah!
 Now I'm assuming you want your picture to stay put. To do that, put a line of hot glue all the way around the inside rim. Press the glue gun down onto paper and sides so that you have a flat line of glue, not a puffed up bead of glue.
 See, like this.
 Next, grab your 2" ribbon (it doesn't have to be grosgrain, but it's just so darn pretty) and wrap it around the tin and cut off about a half inch larger than the tin.
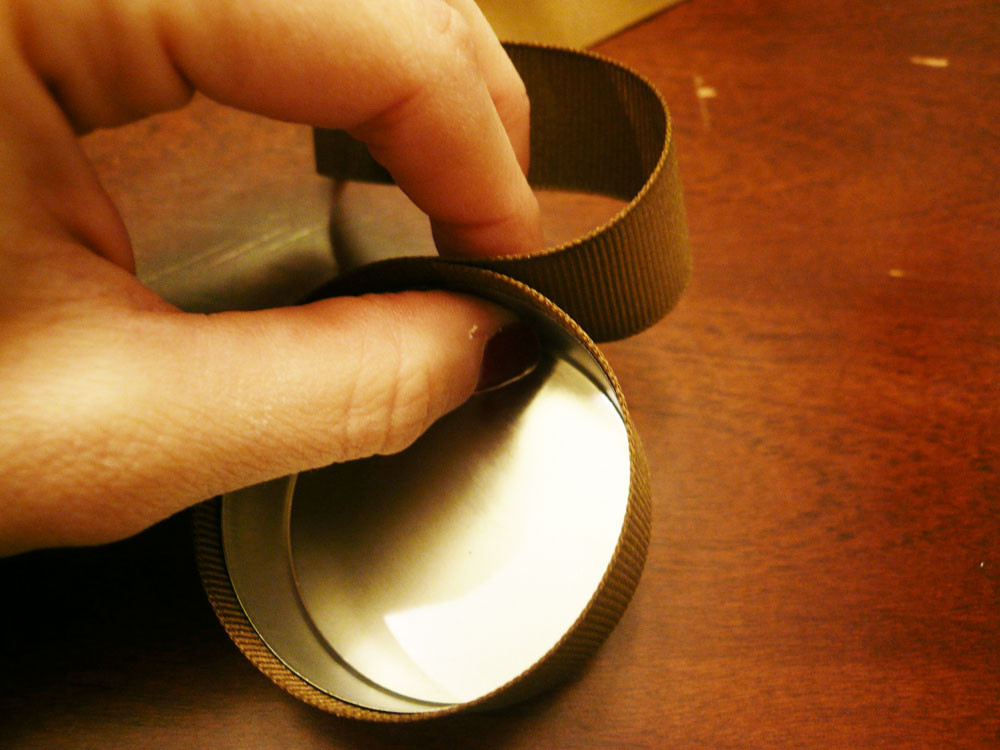 Heat seal the ends of the ribbon. I only have two hand (one to hold the ribbon and one to hold the camera) so now action shot here, but feel free to use a lighter or match, just keep the flame from actually touching the ribbon or it will burn and shrink very fast.
 Fold your 2" ribbon in half.
 And cut a tiny slit on the fold. By tiny, I mean tiny. The hole will be twice as big as what you cut, and you only need a slice as wide as your thin ribbon.
 Cut a good sized loop out of your thin satin ribbon (again, you don't have to use satin, but it's pretty too) and loop it like so.
 Slide your thin ribbon inside the slit in your 2" ribbon.
 The next part was tricky to photograph, but here's what you need to do. Find the middle of your picture at the top of the tin. Set (or glue) the cut ends of the thin ribbon inside the rim of the tin lid at the middle spot. Put the lid on the tin, keeping the ribbon in place. Make sense?
 Fold down your 2" ribbon and you'll see your ornament taking shape. Make sure you have it lined up straight and flush at the front and back of the tin. Hold it in place.
 Fold back the front of the ribbon and apply a thin layer of hot glue. You don't want it to get too bulky under the ribbon. Turn the ornament around and do the same to the back (behind the thin ribbon.
 Now that you have the top of your ribbons secured, go all the way around one side, then the other. Overlap the ribbon on the second side over the first side.
 And you're done. Look at that cute little ribbon poking through with no bulk.
 Rinse and repeat until you have finished them all. These make adorable gifts for far away family, as well as ornaments your kids can look back on in the future and put on their trees when they're grown up. Have fun!

No comments:
Post a Comment